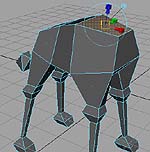
1-"Extrude Face"
on the Back end, and scale
(with the green square), horizontaly, until you have divided the Back end
into 3 faces instead of 1.
2- Then extrude again the
middle face and pull in down (with the blue arrow)... |
 |
| 3- Sclale the same face
really small, then extrude again and scale bigger, then extrude again and
scale smaller again, to look like the picture... |
 |
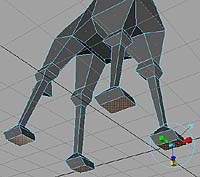
4- Repeat those steps to
extrude the legs:
-First, select the Front/Bottom
and the Back/Bottom Faces.
-Then, use the extrude tool
to scale into 3 faces instead of 1.
- Then, select the 2 outside
Faces of the Front and Back Bottom (4Faces alltogether!), and extrude Down.
-Then extrude all 4 faces
down AND scale smaller with the the square middle handle (for uniform scaling).
-Then extrude down and scale
bigger again.
-Keep repeating those steps
until the bottom of the feet. |
|
| 5-When you want to edit
your shape you can always go to Component mode, and work with Vertices,
or Faces or Edges. |
 |
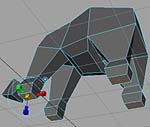
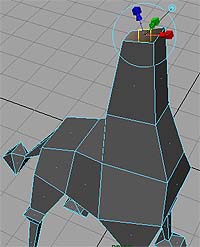
| 6- Go back to the top of
the shape, and Extrude the neck. |
 |
| 7- If you made a mistake
and want to delete a face, you can Select the Face and hit "Delete" on
your keyboard. |
 |
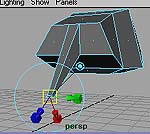
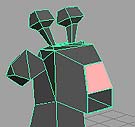
| 8- Use "Polygon/ Append
to Polygon" Tool to recreate the faces: Click on an open edge, follow the
direction of the pink arrows (it's the direction of your face) and click
on another edge, the face is Pink (see pict.) hit ENTER on Keyboard to
accept it. |
 |
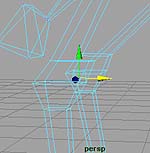
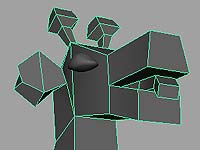
| 9- Use this picture to help
you create the mouth area . |
 |
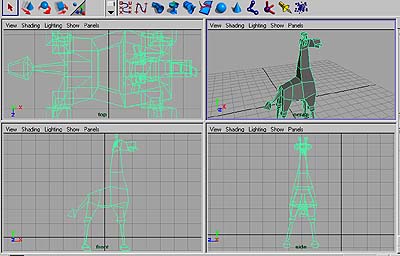
| 10- This is what the giraffe
looks like in all wiewports. |
 |
11-Giraffe 1 is Low polygon
count.
Giraffe 2 is Smoothed on
the edges by the Edit Polygon/Normals/Soften-Harden Edges.
Giraffe 3 is Smoothed by
Polygon/Smooth, with division set to 1.
and Giraffe 4 is Smoothe
by divisions set to 2.
I highly recommend to NOT
set the division to more than 3, since it will make your model too complex
and won't look any better... |
 |