| 1- Create a Primitive polygonal Cube: |
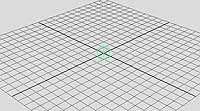 |
Go to: Create/ Polygon Primitives/Cube. (The cube will be created at the origins) |
help |
| 2-Smooth Shade the Cube: |
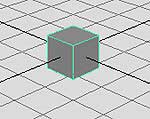 |
hit 5 on keyboard to smooth (hit 4 for wireframe)-(you can also hit F to zoom on your selected object,
or use Alt/leftmousebutton/middlemouseboutton to zoom in or out. |
|
| 3- Select Faces from Component mode |
 |
Right Click the mouse on top of the Cube, and select Face |
|
| 4-Select the facet
(by cliking on the blue dot of that face) on the right side of the cube,
then hold down the SHIFT key and tumble the view to select the cube on
teh left side... |
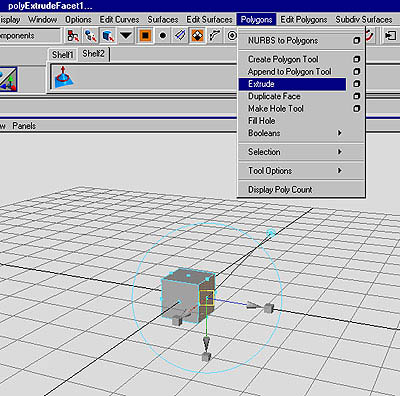 |
Go to Polygon/ Extrude to extrude a Polygonal Face.
Hold SHIFT key to select or deselect faces, or other components or objects.
Use Left Mouse Button + hold down ALT key to Tumble.
Use Middle Mouse Button + hold down ALT key to Pan, left-right- up or down.
|
|
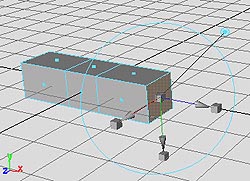
| Extrude the Faces on each side of the cube... |
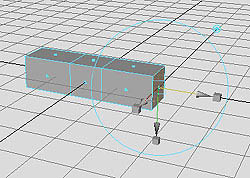 |
Pull the Blue arrow (it will become Yellow because it is selected now),both Facets extrude at the
same time in opposite directions. (staying along the x axis though).
To not be limited in moving the Faces in only one direction, on can select the middle Blue Square and move it around.
Hit the Z key to Undo. |
|
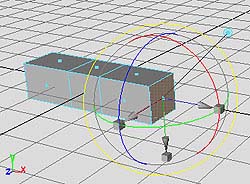
| Investigate the Extrude/SCALING Tool... |
 |
Click on any of the little grey squares next to the direction arrow; The middle changes from a transparent
blue square TO a grey square: You can select and drag the middle grey square to apply a Uniform Scaling to the Face.
Hit Z to Undo. |
|
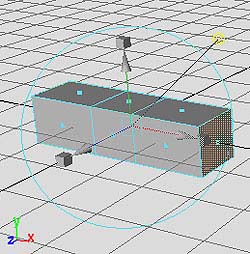
| Investigate the Extrude/ROTATE Tool.. |
 |
Rotate tool activates when you click on the big Blue Circle.
Try rotating the Faces by click and drag along the Blue, Red or Green circles...
Hit Z to Undo, or go to Edit/ Undo in the tool bar at the top of your screen. |
|
| Investigate the Extrude/PIVOT Tool.. |
 |
The pivot point is controled by the "antenna" if you click on the tiny blue circles (it will change
to yellow), you see that all the x,y,z arrows move from the middle of the Face you last selected TO the center of all selected Faces and gets the
same axis as your Scene's System Coordinates (see bottom left of picture)..
Click on the "antenna" again to move the pivot back to the center of the Face (The x, y, z arrows will be back to following the directions of the Face(s) you created) |
|
|
BACK to the Tutorial page. |
NEXT Page>>> |
|

